Products and Tools
My Travel Coffee Setup
20 Jan 2017

I’m a coffee nut. I own more brewing equipment than most coffee houses, home roast as a hobby, and generally drink way too much of the stuff. I also travel a lot, which presents a dilemma: how do I get my fix when I’m on the road? This is complicated by the fact that I travel light and never check a bag. I’ll go on two week trips with just carry on luggage, so bag space is at a premium.
Over time I assembled the ultimate coffee geek road warrior setup. Every time someone hears about it, they want the details, so I’m posting it here so I have something to point to.
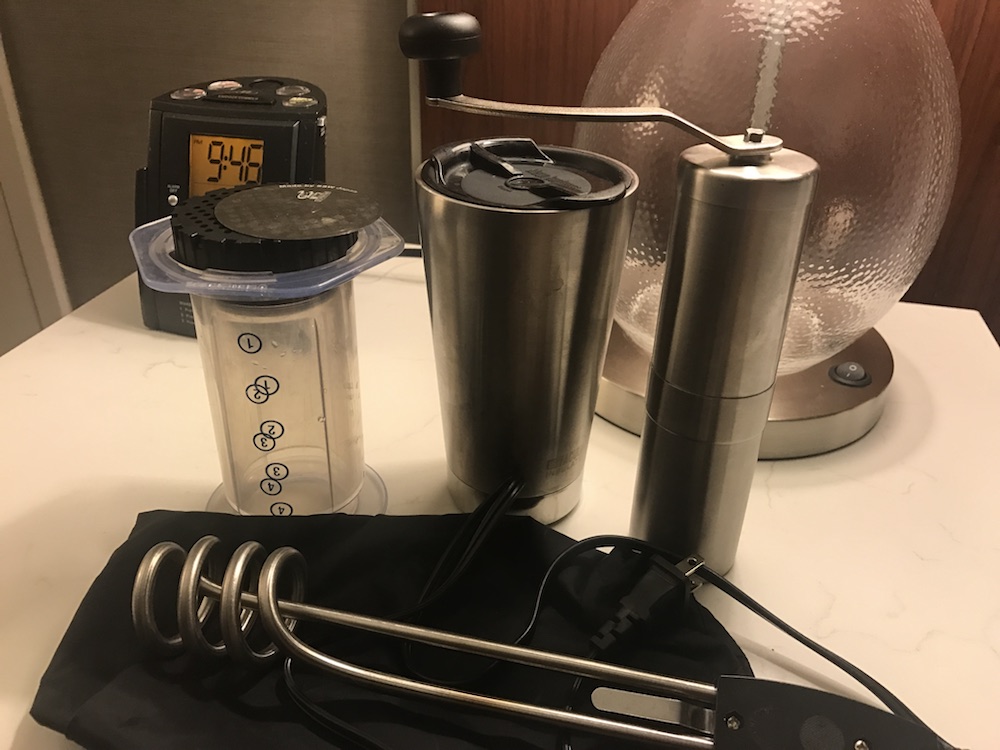
I’m on the road now, and took some authentic travel photos in the hotel room.
The Gear
For the brew itself, I use an Aeropress. Mine is the first generation and looks a little different than the smoked gray one they sell now, but the size and components are all the same. At the time of this blog post, it’s $30. Ignore the brew instructions that come with it and look around on the internet for Aeropress recipes. Serious coffee people have written some serious instructions for it. My personal method is below.
You need a cup that’s small enough the Aeropress can fit on top of, but small enough to hold the body of the Aeropress. I use a Klean Kanteen 20 oz tumbler. At $27 it’s expensive for a cup, but don’t skimp and get the cheaper 16 ounce version. It won’t work since the interior isn’t wide enough to hold the Aeropress body inside. The Aoocan 20 ounce tumbler is a lot cheaper at $12 and will also fit Aeropress inside. I haven’t used the Aoocan, but I’ve tested the size and it works. The Kleen Kanteen comes with a great lid that’s flat and easy to travel with. The Aoocan is lid-less. (Update: the Yeti 20 oz tumbler also works, and I like the lid better.)
There’s a lot of handheld grinders that are designed to fit inside the hollow body of the Aeropress plunger. Mine is the original one of these, the $60 Porlex. There’s a lot of cheaper imitations out there that are highly rated. Just make sure the description or the reviews say it will fit inside the Aeropress plunger. This $23 model seems to be a good option.
For boiling, I use an immersion heater because they are small and pack well. Not all hotels have a microwave or a kettle in the room, and the coffee makers you find in rooms are often dirty and do a poor job of heating water. The standard travel immersion heater that you can get at the airport or the luggage store (like this one) will work in a pinch, but they’re low powered at 125 watts and will take a long time to boil your water. Expect 15-20 minutes before you get to a boil.
A higher wattage one will boil faster, like this 300w heater. One disadvantage of these is that the heater isn’t long enough to reach the bottom of the 20 oz mugs, so you only heat the top 3 inches of the water. You’ll want to stir the water up when you’re done. To solve this problem, I’ve recently started using a longer 1500 watt heater. It takes up a little more space in my bag, but not a whole lot. It’s listed for 110 volts only, and I haven’t tried it outside the US on a 220v system yet, so I’ll be taking one of my 300 watt heaters along as a backup. (Update: I have tried this at 220v. It catches fire. Don’t do this. I now take a 125 watt one when going to 220v countries.)
Monitor your boil. Not only do you not want a rolling boil for your coffee, but these immersion heaters aren’t the safest things in the world. You’re converting electricity to heat through pure resistance in a tiny package that gets banged around a lot. I’ve had more than one catch fire while boiling. If that happens, just unplug it and dunk it right in the water you were boiling.
Optional gear
The Aeropress uses paper filters, and they can be a little messy to deal with. There’s a bunch of metal filters out there that you can use to replace the paper. The one I use is from a coffee geek shop in Tokyo, and I can’t find the same one on line. The Able Brewing Disk is very similar. It’s a very fine laser perforated disk. There’s also some that use mesh screens. You’ll get a thicker cup with more sediment in it with a mesh, and a cleaner cup with less body with a perforated version.
You’re going to have a few loose parts: the Aeropress filter holder, the paper or metal filters, possibly a lid for the tumbler, the grinder handle, and your immersion heater. You’ll probably want a bag to keep it all in. I use a small nylon drawstring bag to keep it all together.
Total
At the time of this post, going with the cheaper options above and getting both the optional items, you’ll spend just under $90. The more expensive versions will run you about $50 more.
The packing method
Set the funnel and the stirring paddle aside. You won’t bring them with you. I don’t even know where mine are anymore. If you’re using paper filters, throw a handful of them in a plastic bag.
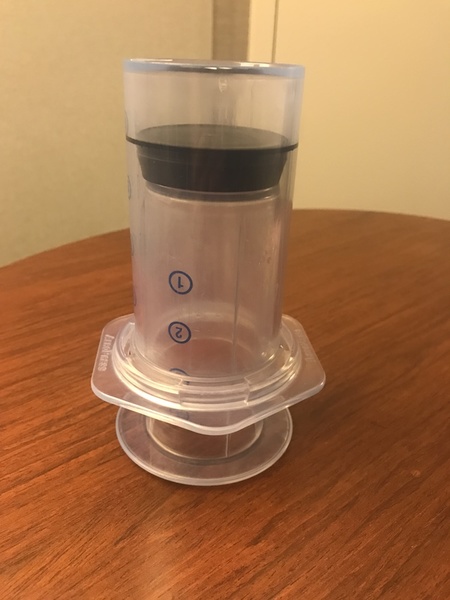
Take the plunger out of the Aeropress. Insert it into the other end so the wide part of the plunger base and the wide part of the Aeropress body are on the same end, and push the plunger all the way in. You’ll end up with all the wide parts at one end and the narrow parts at the other.

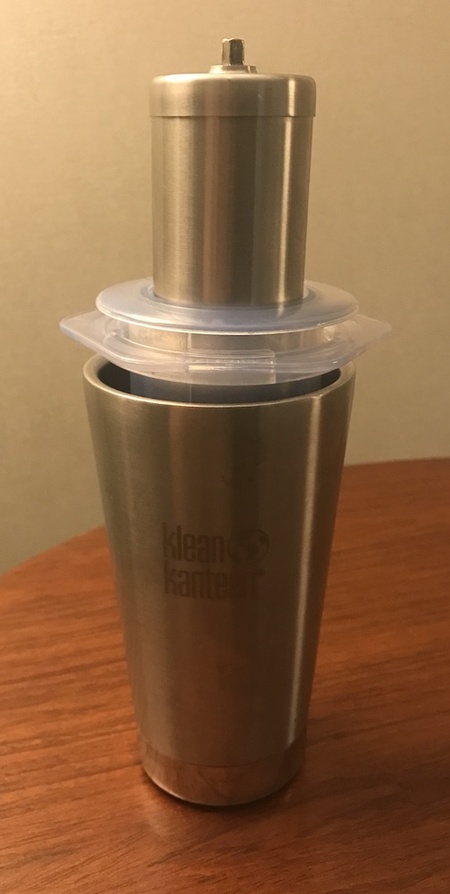
Put the inside-out Aeropress into the cup.
If you’re traveling for a day or two, put enough beans for your trip into the grinder, and take an empty coffee bag along to transfer it to when you unpack. Otherwise, just toss the bag of coffee into your bag.
Put the grinder into the hollow Aeropress plunger.

The brewing method
Fill the cup with water. Bottled water is preferred, since you never know what the hotel room tap water is going to taste like. I leave about an inch and a half of room in the cup so the boil doesn’t make a mess.
Grind the coffee to a fine grind. I grind 30-35 grams of coffee, which is just enough to reach the bottom of the #2 on the Aeropress at my grind. Instead of carrying a scale to weigh my coffee when I travel, I do it by eye. I know that when I fill my grinder with 32 grams of whole beans, they reach just below the top of the fins inside my grinder. So I pour in enough beans to get there. The bean size and the accuracy of my eyeballs causes the exact amount of coffee I use to fluctuate, but I don’t want to carry a mini scale just to weigh my beans and water. I’m crazy, but not insane.
Heat the water. You want about 190 degrees Farenheit. If you stop if just before it reaches a rolling boil, and then take the heater out of the water (unplug it first, or you’ll burn it out), then wait 45 seconds, you’ll be close to 190, and you won’t need to carry around a thermometer. Again, crazy, but not insane.
To brew, put the plunger in the Aeropress just enough to create a water tight seal. Put it down on the counter with the plunger down and the filter side pointing up. Put your coffee in, and then pour water in right to the top. You’ll still have about 1/3 of the water remaining in the cup. Leave it there.
Attach the filter, swirl the coffee inside a few times to make sure all the grounds are saturated, then flip and immediately press into your cup. It will mix with the hot water that’s in the cup already.
I don’t like to drink from my brew cup if I can avoid it, so I’ll pour the coffee into paper or ceramic coffee cups provided by the hotel room. If there’s nothing available, I’ll just drink from the mug.
Cleaning
During a trip, I just dump the grounds and rinse the Aeropress and cup with water immediately after use. When I get home, the Aeropress and cup go in the dishwasher. Every few trips, I’ll soak the grinder in Oxyclean to clean the coffee oils from the burrs.
If it’s a particularly long trip, I carry a small container of powdered Oxyclean with me that I use to wash clothes, and I’ll boil a half cup of water, then toss all the coffee gear parts in there with some Oxyclean.